Alternator Overcharging: Symptoms, Causes, and How to Fix

Having problems with your car battery dying repeatedly or seeing warning lights related to the charging system? You may have an overcharging alternator causing issues.
An alternator overcharging means the alternator voltage regulator has failed, causing excess voltage to be sent to the battery and electrical system. This can quickly damage a new battery and cause wiring harnesses to melt or catch fire if left unaddressed.
Can an overcharging alternator damage your car? Absolutely. Allowing an alternator to continually operate at high voltages above 15 volts can destroy batteries, fry delicate electronics, and potentially even create an electrical fire hazard.
This guide will cover the tell-tale symptoms of an overcharging alternator, how to diagnose it, and most importantly – how to stop an overcharging alternator before it causes costly damage. Whether a faulty regulator, bad diodes, or loose wiring, we’ll explore the common culprits and walk through several fixes you can make to restore normal charging system operation.
Let’s get started! Here’s what we’ll cover:
- What causes an alternator to overcharge and fail
- Common symptoms that signal overcharging issues
- How to test and confirm an overcharging alternator diagnosis
- Actionable steps to fix an overcharging alternator via regulator replacement, brush replacement, alternator replacement, or wiring repair
- Best practices to prevent overcharging problems in the future
After reading, you’ll know exactly how to get your overcharging alternator under control. Let’s dive in!
Table of Contents
What Causes an Alternator to Overcharge?
First, a quick alternator overview. The alternator is the modern solution for powering all of the electronics in your vehicle as well as keeping the battery charged. It uses rotational energy from the engine’s crankshaft pulley to spin magnets inside copper windings and generate alternating current (AC) electricity which is converted to direct current (DC) for vehicle use.
The key component controlling the voltage output is the voltage regulator. This senses the system voltage and adjusts the current flow in the rotor magnets to maintain a steady ~14 volts.
When this regulation fails, the voltage can spike out of control, leading to overcharging. The most common causes include:
Faulty Voltage Regulator
The sensing and control mechanisms in the regulator can fail over time, especially due to heat exposure. This failure leads to uncontrolled voltage output over 15 volts. The regulator may be a standalone component or integrated into modern computer-controlled alternators.
Worn Out Diodes
Diodes act like one-way gates allowing current to flow in only a single direction. The diode trio is key to converting AC to DC current. If they are old, shorted, or rusted, they can fail to prevent reverse current flow. This allows excess voltage to reach the battery and overcharge it.
Loose or Corroded Wiring
Loose battery cable connections or ground wiring can create resistance in the charging circuit. This acts like a bottleneck that builds up voltage before the battery connection. Even small amounts of corrosion or looseness can spike charging voltage over time as resistance accumulates.
Now that you know what can make an alternator overcharge, let’s highlight the typical symptoms.
5 Common Symptoms of an Overcharging Alternator
Watch for these warning signs of an overcharging alternator:
- High voltage reading at the battery with engine running – Use a multimeter to test voltage at the battery terminals. An overcharging alternator will show high voltages over 15 volts with a warmed up engine running above idle.
- Dimming or flickering lights – As the excess voltage charges the battery, it can cause the lights to dim or fluctuate in brightness. This flickering indicates voltage spikes.
- Battery dies quickly after replacement – A brand new battery that dies again after a few weeks or months is a classic sign of an overcharging issue rapidly killing batteries.
- Melted battery terminals or wiring – Extreme overcharging can literally melt the lead battery posts as well as overheat nearby wiring and harnesses. Watch for melted plastic, exposed wiring or burnt smells.
- Smell of burning wires – Overheated wiring from excess current will give off an alarming burning odor. If you smell burning plastic and rubber, immediately inspect the alternator wiring for issues.
Seeing one or more of these symptoms? It’s time to confirm if your alternator is indeed overcharging. Let’s cover the diagnostic steps.
How to Diagnose an Overcharging Alternator
Don’t just replace parts and hope for the best. Take the time to properly diagnose an overcharging alternator using these techniques:
Use a Multimeter to Test Voltage
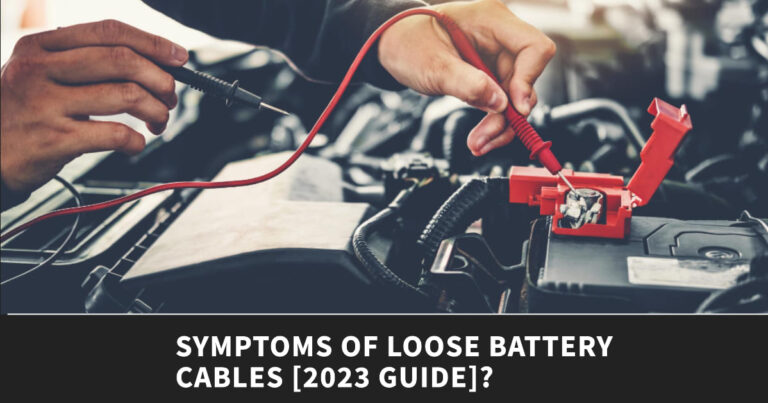
Using a digital multimeter is the best way to check for overcharging conditions. Follow these steps:
- Connect the red lead to the positive battery terminal and the black lead to the negative terminal.
- With the engine off, the voltage should read 12.4 – 12.6 volts.
- Start the engine and let it reach operating temperature. Rev the engine to 2,000 RPM.
- The voltage should read between 13.5 – 14.5 volts. If it climbs above 14.5 volts, you likely have an overcharge problem.
- Test at idle and at higher RPMs to determine the charge profile. If voltage is high even at idle, the regulator is likely shot.
This simple voltage test can confirm if your alternator is overcharging and needs repair.
Check for Loose Battery Connections
Loose or corroded battery cables are prime suspects for causing resistance-induced overcharging.
Follow these tips for inspecting connections:
- Wiggle the battery cables at both ends to check for a loose fit or corroded posts.
- Use a wire brush to carefully clean any corrosion on terminals or ground wiring.
- Ensure connections are tightened properly to factory torque specs. Don’t overtighten.
- Check that the negative battery cable connects solidly to bare metal in the body, engine block, or chassis for a robust ground connection.
Loose connections are easy to fix. A little maintenance can prevent resistance and overcharging.
Have the Alternator Tested
For confirmation, you can have your alternator bench tested for free at many auto parts stores. This tester applies loads and checks output at various RPMs to verify performance outside of the vehicle.
This professional diagnostic will pinpoint if the alternator itself is failing and needs rebuilt or replaced.
With overcharging verified, let’s discuss how to fix the issue for good.
4 Ways to Fix an Overcharging Alternator
Repairing or replacing the faulty components causing voltage to spike will restore normal charging function. Here are your options ranked from easiest/cheapest to more complex:
1. Replace the Voltage Regulator
Since a bad regulator is the most common culprit, replacing just the regulator is worth trying as the most affordable fix:
- The regulator may be a separate unit you can unplug and easily swap. Or it may be integrated into the back of the alternator requiring alternator removal to access.
- New regulators cost $20-60. Match part numbers to ensure compatibility.
- Watch online tutorials to safely replace either style regulator. Take basic precautions against shocks or shorts.
- Test charging voltage after replacement. If fixed, you saved big over replacing the whole alternator!
2. Replace the Brushes
Worn “brushes” that press against rotating contacts to pass current are a common wear item. Inspect and replace brushes:
- Inspect brushes for minimal length of 1/4 inch or less indicating they need replacement.
- Replace as a set for $10-15. Better than buying a whole new alternator.
- Check for smooth operation of brush springs pressing them into contact after replacement.
- Clean any grooved contact surfaces on the rotor with emery cloth.
3. Replace the Alternator
If the regulator and brushes are not the issue, the alternator itself will need rebuilding or replacing:
- Check for worn bearings allowing shaft play or grinding noises indicating a bad alternator.
- Purchase an exact replacement remanufactured/new alternator for $150-500+ based on vehicle make and amperage.
- Safely remove both battery cables before attempting alternator replacement to avoid shorts.
- Label and disconnect wiring harnesses. Transfer any accessories like fans to the new unit.
- Install the new alternator, tension belts, and reconnect wiring in reverse order of removal.
4. Correct Wiring Issues
Finally, inspect wiring thoroughly and make any corrections needed to ensure solid connections:
- Verify the alternator red-wire connection to the battery senses voltage correctly.
- Tighten and clean battery terminal and ground connections.
- Look for melted/damaged wires that need replacement due to overcharging damage.
- Confirm ground strap connects solidly to the chassis/engine block grounding both the alternator and battery.
- Check for loose plugs or damaged pins in wiring harnesses related to charging.
The alternator can only charge properly if electrical connections are clean and snug at both ends.
Preventing Alternator Overcharging Issues
Once you’ve solved your overcharging issue, keep your charging system in top shape with prevention:
- Inspect battery cables and connections regularly for corrosion. Clean and protect terminals with dielectric grease.
- Watch for frayed or cracked wiring needing replacement. Undo zip-ties to check hidden wires.
- Have your alternator tested for proper voltage regulation annually as part of a tune-up.
- Consider upgrading your charging system for heavy electrical loads. High-output alternators prevent strain.
- Install voltage monitoring gauges to stay on top of system voltage. Catch overcharging before it damages the vehicle.
With diligent monitoring and maintenance, you can avoid annoying and damaging overcharging problems!
Conclusion
As you’ve learned, an overcharging alternator can seem like an elusive electrical gremlin damaging your ride and draining your wallet on replacement batteries.
But armed with the troubleshooting tips in this guide, you have the knowledge to quickly identify symptoms, test charging voltage confirmation, and correct the real root causes, from bad regulators and diodes to loose battery cables.
Stopping an overcharging alternator in its tracks before it fries your vehicle’s electrical system is achievable and money-saving when you DIY. Our steps and instruction give you the ability to solve overcharging for good.
Now you can drive on with confidence, leaving dead batteries and dimming lights behind you! Just be sure to periodically check voltage and connections to prevent any future issues. Your alternator plays a crucial role in powering all of your ride’s electronics and lighting. Keep it running cool and steady with the tips you’ve learned today.

