U1000 Code: Diagnosing & Fixing This Troublesome OBD2 Error

As any auto enthusiast knows, that dreaded moment when your check engine light comes on can really put a damper on your day. You pull out your trusty OBD2 scanner, plug it in and see the code U1000 pop up. “Ugh, not again!” you think. But what exactly does the U1000 code mean? What causes it? And more importantly – how do you fix it?
This comprehensive guide will walk you through everything you need to know about tracking down and repairing the pesky U1000 trouble code. We’ll cover:
- What is the U1000 Code and What Does it Mean?
- Common Symptoms of a U1000 OBDII Code
- What Triggers a U1000 Diagnostic Trouble Code?
- How to Diagnose the Source of the Problem
- Potential Solutions and Repairs for U1000
- Estimated Repair Costs for U1000 Issues
- Do You Need a Mechanic to Fix U1000?
So if you find yourself staring confused at yet another U1000 code, have no fear. By the end of this guide, you’ll have the knowledge to get your ride back on the road where it belongs.
Table of Contents
What Exactly is the U1000 Code and What Does it Mean?
Essentially, the U1000 code signifies an issue with the communication system between electronic control modules in your vehicle. It specifically indicates there is a problem with the Controller Area Network (CAN) bus lines.
The CAN bus system is the central nervous system of your car, allowing the various modules and computers to “talk” to each other. When you see U1000, it means these electronic components are having trouble communicating due to some kind of fault.
Some examples of modules that use the CAN bus include:
- Engine Control Module (ECM)
- Transmission Control Module (TCM)
- Anti-Lock Braking System (ABS) module
- Airbag Control Module
- Door Control Unit
- Audio/Navigation systems
So in plain English – the U1000 code means there is a communication breakdown somewhere in this vital data network.
Having covered the meaning behind U1000, let’s look at some common symptoms this trouble code can cause.
What Are the Most Common Symptoms of a U1000 OBDII Code?
Because the U1000 deals with the core communication network, you can experience a wide array of possible symptoms when this DTC is set, including:
- Complete failure of multiple electronic modules – Since CAN bus communication is disrupted, various vehicle modules can malfunction or stop operating. For example, power door locks, windows and even climate control can cease functioning.
- Check Engine Light illumination – The Check Engine Light (also called Service Engine Soon light) will illuminate on the dash to alert the driver of an issue.
- Poor engine performance – With the ECM unable to properly communicate, engine operation can suffer. Symptoms may include rough idle, stalling, hesitation, or lack of power.
- Reduced fuel economy – The engine and transmission not operating efficiently due to communication faults can decrease MPG.
- Intermittent electrical issues – If a short is present, you may experience random electrical components cutting in and out.
As you can see, a U1000 code can create a variety of potential symptoms. But what causes this OBDII trouble code in the first place? Let’s explore that next.
What Triggers the U1000 “Bus Off” Trouble Code?
There are a several different root causes that can create CAN communication faults leading to a U1000 code:
- Damaged CAN Bus Wiring Harness – The wires that physically connect the various modules can become damaged, causing network communication failure. This is one of the most common causes.
- Faulty CAN Bus Control Module or Interface – The module or interface that controls the CAN network can malfunction electrically or suffer internal software glitches.
- Bad Grounds and Short Circuits – Electrical issues like improperly grounded wires or short circuits in the CAN network wiring can disrupt communication.
- Software Glitches and Parameter Coding Errors – Software bugs and incorrect module coding parameters can sometimes manifest as communication faults.
- Loose Connections or Corroded Pins – Connectors that link CAN bus components can work loose over time or succumb to corrosion, disrupting communication.
Essentially any issue that interrupts the transmitting and receiving of data over the CAN bus communication lines can lead to the dreaded U1000.
Now that we understand potential causes, let’s go over how to diagnose a U1000 DTC.
Effective Diagnosis of a U1000 Trouble Code
When you’re dealing with a wiring network issue like U1000, systematic troubleshooting is key to isolating the root cause. Follow these diagnosis steps:
Step 1: Scan for Codes with an OBD2 Scanner Tool
Connecting a scan tool to access onboard diagnostics data is always the first step. This will confirm the U1000 is present and also alert you to any other associated DTCs.
Step 2: Inspect the Condition of CAN Bus Wiring
With U1000 pointing to a communication disruption, visually checking the physical CAN bus wires for damage is wise. Look for corroded or pinched wires, loose plugs, etc. Wiggle harnesses while monitoring a scan tool for wiring breaks.
Step 3: Check for Communication Errors in Module Data
Most scan tools allow you to view “live data” from various modules. Check for communication errors and network data faults to help narrow down the source.
Step 4: Conduct CAN Bus Voltage and Continuity Tests
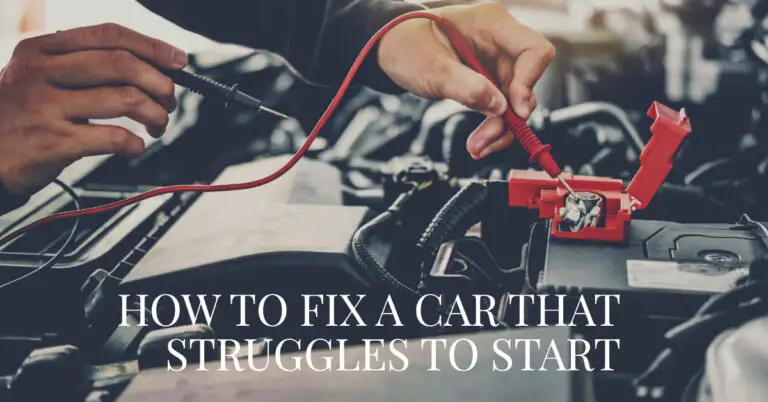
Using a DVOM multimeter, check CAN Hi and Lo wires for proper voltage levels and continuity from one end of the bus to the other. This can reveal shorts, opens, etc.
Step 5: Swap or Replace Suspect Modules
If you suspect a specific module is at fault, substituting in a known good replacement module can help confirm diagnosis.
Methodically following these troubleshooting steps will zero in on whatever is disrupting CAN communication and causing the U1000.
Potential Fixes and Repairs for U1000 Code
Once the root cause of the issue is identified, here are some potential repairs that can resolve a U1000 DTC:
- Wiring Harness Repair – Carefully repair or replace any damaged CAN bus wiring. This may require wiring in a new harness.
- Replacing Faulty CAN Module – If for example the CAN controller module is bad, install an new replacement unit.
- Fixing Electrical Shorts/Bad Grounds – Any shorts, bad grounds, or loose connectors must be repaired to restore communication.
- Software/Coder Updates – Updated software or module coding from the dealer can overcome program glitches.
- ECM/TCM Reprogramming – In some cases, the ECM or TCM may need to be re-flashed by the dealer to restore function.
- Cleaning Corroded Connections – Removing corrosion and using electrical grease on connectors can clear up dirty/oxidized pins.
In many cases, there are multiple faults that accumulate to finally trigger the U1000, so addressing all identified issues is key to fixing it for good.
How Much Does It Cost to Repair a U1000 OBDII Code?
When it comes to auto repairs, cost is always a consideration. Here are some ballpark estimates on resolving a U1000 trouble code:
- $100 – $200 for Deeper Diagnostics – If the cause isn’t clear after basic testing, a mechanic may need 1-2 hours to fully diagnose the issue.
- $200 – $300 for CAN Bus Wiring Repairs – Fixing damaged sections of CAN bus wires or installing new wiring can run $100 – $150 in labor, plus part costs.
- $300+ for Module Replacement – Bad modules will add up: $100 or more for the part, 1-2 hours to program and install.
- $100+ for Software Updates and Reprogramming – Labor at the dealership to reflash modules and update software.
As with any fix, costs can vary widely based on the year, make and model of vehicle. The best plan is to accurately diagnose the specific issue causing your U1000 code, then price the repair accordingly.
Do You Need a Mechanic to Fix a U1000 Trouble Code?
Can you repair a U1000 code yourself or do you need to go to a professional mechanic?
- For basic troubleshooting like reading codes and inspecting wires, DIY repairs are possible with some automotive repair knowledge. But digging deeper often requires special tools and know-how.
- For complex diagnoses of data faults, module issues or electrical gremlins, the advanced capabilities of a professional technician are almost always required. Their years of experience can find bugs you might miss.
- When software glitches, reprogramming or calibration updates are needed, only a dealership technician with proprietary OEM software access can typically perform the repairs.
While parts like CAN bus wiring harnesses can be replaced DIY-style to fix many U1000 codes, the convenience and expertise of a pro mechanic is recommended for efficient repairs you can trust. Their diagnostic capabilities will save you headaches – and probably money in the long run.
In Closing – You’ve Got This!
Tracking down and repairing the obscure U1000 code can be frustrating. But armed with the diagrams, knowledge and troubleshooting techniques outlined in this guide, you have all the tools needed to successfully conquer that confusing U1000 once and for all.
As you turn the key and watch your check engine light switch off for good, you’ll experience that feeling of relief knowing you’ve got this whole CAN bus diagnosis thing handled. U1000 is no match for your tenacity and trusty OBD2 scanner. And your wallet thanks you!
